
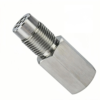
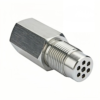
Firaki O2 Sensor Spacer Adapter, 46.6 mm with Mesh Insert
₨ 2,299
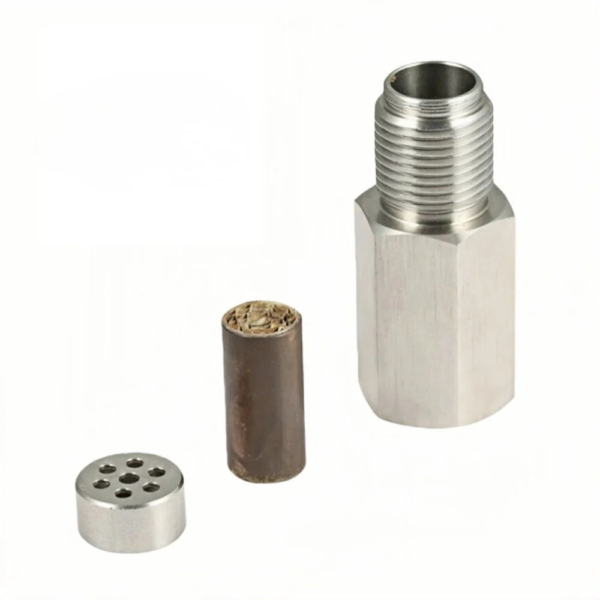
The Firaki O2 Sensor Spacer Adapter is a 46.6 mm straight, screw-in fitting for a compatible rear oxygen sensor. It mounts between the threaded exhaust port and your existing sensor, which keeps its original wiring and connector. Check the threads at both ends, the sensor probe depth, and the clearance around the exhaust port before ordering.
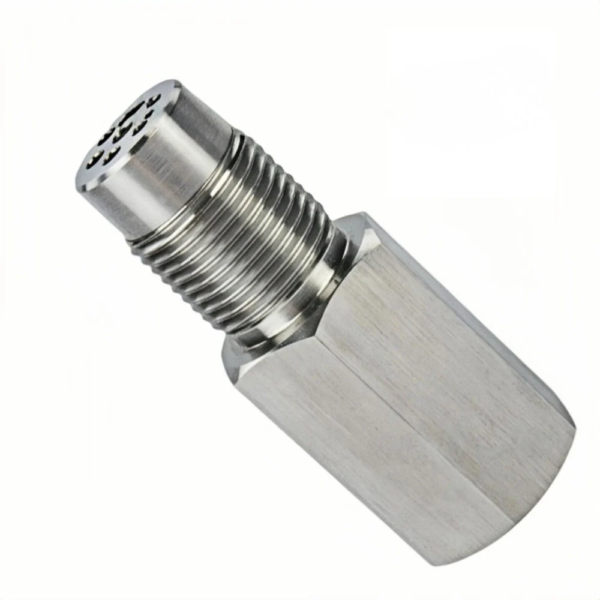
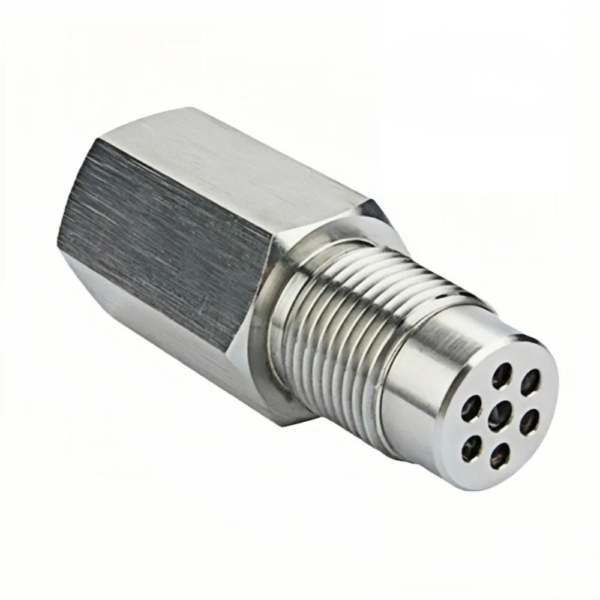
- Straight metal body with a hex base for wrench access
- External thread for the exhaust port and internal thread for the existing sensor
- Mesh insert at the exhaust-facing tip
- For compatible rear sensor positions after the catalytic converter
- Includes one spacer adapter for use with your existing oxygen sensor.
Prefer to order manually? Chat with our team. Your order is confirmed only after we verify the details.
How the O2 Sensor Spacer Adapter Works
The Firaki O2 Sensor Spacer Adapter is a straight, 46.6 mm mechanical fitting for a compatible rear oxygen sensor. It mounts in the existing threaded opening in the exhaust, sometimes called the sensor bung. The spacer’s external thread fits into that opening, and its internal thread accepts the original sensor. This moves the sensor farther out along the same line as the original port. The hex base provides a surface for a wrench when the adapter is seated or removed.
The exhaust-facing tip has a mesh insert. Exhaust gas can reach the sensor probe through the screened opening, while the sensor remains connected to the car through its original plug. The sensor still measures oxygen in the exhaust and sends a reading to the vehicle’s computer. The spacer itself has no wiring or electronics. A working oxygen sensor is needed to use it, and the package contains one adapter.
Where to Find the Rear Oxygen Sensor
Start by locating the main catalytic converter in the exhaust system. The rear oxygen sensor, also called the downstream or post-catalyst sensor, sits after the converter in the direction of exhaust flow. Depending on the vehicle, it may screw into the converter outlet or into a section of pipe farther back. Some exhaust layouts have more than one converter or more than one rear sensor, so identify the exact mounting point before removing a part.
A scan tool or service manual may identify the rear sensor as Sensor 2, as in Bank 1 Sensor 2. The bank number identifies the relevant side of the engine on vehicles with more than one bank. Use the service information for your vehicle to match that designation to the sensor’s physical location. This adapter is intended for a compatible downstream position. Keep the upstream sensor in its factory location, where its readings help the engine manage the air-fuel mixture.
How to Check Both Threaded Connections
Fitment involves two separate connections. The male thread on the adapter must match the exhaust port, and the female thread must match the existing sensor. Both connections need the correct thread diameter and pitch. For example, a sensor may look the right size when held against the opening, yet start binding within a turn if the pitch differs. The 16.9 mm sensor-side opening and 16 mm exhaust-facing tip are physical dimensions of the adapter. Use the thread specification or a thread gauge to check the actual connection.
When shopping by vehicle name, start with the model year, engine, and rear sensor part number. If the exhaust has been replaced or modified, have the shop check the threaded port on the pipe fitted to the car. Compare the two parts before installation, and start each threaded connection by hand. Stop if either part starts at an angle, binds, or needs wrench force to engage. Forcing the fit can damage the threads in the exhaust port or on the sensor you plan to reuse.
Check Probe Depth, Space Around the Port, and Cable Reach
Look at how far the sensor probe projects beyond the surface where the sensor seats. The probe needs enough depth inside the adapter to clear the mesh insert once the sensor is fully seated. A probe that touches the mesh can prevent the sensor from seating even if the threads turn freely. Have the technician compare the probe length with the usable depth of the adapter, using the mating surfaces as the reference points.
The 46.6 mm overall length includes the part that threads into the exhaust port, so use the installed seating surface to judge how much space the assembly will occupy. A straight spacer keeps the same orientation as the original port. If the sensor points toward a heat shield, crossmember, or underbody panel, check the room available in that direction. Allow space for the sensor body, the wiring bend, and the tool needed to install or remove it. The original harness must still reach its connector comfortably without stretching, twisting, or contacting the exhaust.
Inspect the Sensor and Exhaust Port Before Reusing Them
Look at the condition of the original parts once the rear sensor is out. If it came out with damaged threads, or the port has a visibly uneven seating surface, have the shop inspect that connection first. The adapter depends on the existing port for support and sealing. It also adds a second joint between the port and the sensor, so both surfaces need to let their parts seat properly.
Check the sensor connector and the section of cable closest to the sensor. A loose connector, cracked insulation, or evidence that the cable has rubbed against a bracket should be addressed before the sensor is reinstalled. This is also a good time to identify where the harness clips back in, while the original routing is still easy to see.
What a Proper Installation Looks Like
With the exhaust cool, an exhaust technician can check the port threads and seating surface before fitting the adapter. The spacer should start smoothly by hand, and the sensor should seat inside the spacer with its probe clear of the mesh. Each connection should be tightened to the applicable specification. The original plug then reconnects, and the harness can be secured along a route that keeps it away from hot surfaces and moving parts.
Ask the technician to check the two threaded joints for leaks after installation and confirm that the rear sensor and catalyst monitor operate normally. If the new position strains the harness, brings the assembly against nearby hardware, or interferes with normal monitoring, the installation needs to be corrected. The spacer is suited to a vehicle only when the complete assembly fits and the emissions monitoring system continues to work as intended.
If You Are Shopping Because of a Check-Engine Light
If you have a code such as P0420 or P0430, have the vehicle diagnosed before changing the sensor’s mounting position. These codes relate to the catalyst efficiency of the monitored bank. An exhaust leak, a sensor or wiring problem, an engine running fault, or a damaged converter can lead to different repairs. A shop can inspect the exhaust and wiring and use live sensor data to help identify the cause.
Choose the part that addresses the diagnosis. A failed rear oxygen sensor needs the correct replacement sensor. Damaged wiring needs repair, and a faulty main catalytic converter needs the appropriate exhaust repair. This adapter changes the mounting position of a working sensor in a compatible port. Keep the main catalytic converter in place and resolve the underlying fault before considering a spacer.
Specifications
| Specification | Detail |
|---|---|
| Product type | Straight O2 sensor spacer adapter |
| Body | Metal with hex base |
| Overall length | 46.6 mm (1.83 in) |
| Exhaust-facing tip diameter | 16 mm (0.63 in) |
| Sensor-side opening | 16.9 mm (0.67 in) |
| Exhaust-side connection | External thread |
| Sensor-side connection | Internal thread |
| Insert | Mesh at the exhaust-facing tip |
| Intended mounting position | Compatible downstream O2 sensor port |
| Electrical connection | Existing sensor and connector are reused |
| Package contents | 1 O2 sensor spacer adapter |
How to Install the O2 Sensor Spacer Adapter
Have an exhaust technician confirm fitment and install the adapter. Work with the ignition off and the exhaust fully cooled. If the work requires access underneath the car, use a vehicle lift or properly rated stands.
- Locate and remove the rear sensor. Confirm the downstream position using the vehicle’s service information. Disconnect the sensor plug, then remove the sensor with an appropriate oxygen sensor socket. Keep the wiring free of twists.
- Check the exhaust port. Inspect the threads and seating surface for damage. Start the spacer by hand so you can feel whether the threads engage smoothly. If it binds or starts at an angle, stop and recheck the thread match.
- Fit the existing sensor into the spacer. Start it by hand and check that the probe clears the mesh and that the sensor seats properly. Follow the applicable tightening specifications for each connection.
- Reconnect and check the assembly. Route the original wiring away from the hot exhaust and moving parts. Confirm that the connector reaches without tension, then have the technician check for exhaust leaks and verify normal rear sensor and catalyst monitor operation.
Frequently Asked Questions
Is an O2 sensor spacer adapter the same as an oxygen sensor?
The adapter is the threaded fitting that holds the sensor. Your original oxygen sensor remains the part that measures oxygen in the exhaust and reports it to the vehicle. You will need a working rear sensor to use this spacer.
Where does the adapter go?
It fits into the exhaust port used by a compatible rear oxygen sensor, after the catalytic converter. The sensor screws into the open end of the adapter. On vehicles with several oxygen sensors, use the service manual to identify the correct downstream position.
Can I use this spacer on the upstream oxygen sensor?
Keep the upstream sensor in its original position. The engine typically uses the upstream sensor’s readings to adjust the air-fuel mixture. This spacer is for a compatible downstream application confirmed by an exhaust technician.
Will it fit my Toyota, Honda, Suzuki, or other car?
Fitment depends on the engine, rear sensor, and exhaust layout for your model year. The threads on both sides must match, the sensor probe must clear the mesh, and there must be space for the installed assembly and its wiring. Check the rear sensor part number or have your mechanic compare the fittings.
Is 16.9 mm the thread size?
The 16.9 mm measurement is the width of the sensor-side opening. Thread size depends on the nominal thread diameter and pitch. Check both before ordering so the adapter can seat correctly in the exhaust and accept the original sensor.
Will it fix P0420, P0430, or a check-engine light?
A spacer cannot repair the underlying cause of those codes. P0420 and P0430 relate to catalyst efficiency on the monitored bank. Have a mechanic check for leaks, engine running problems, sensor or wiring faults, and catalyst condition before choosing a repair.
Does the mesh insert replace the main catalytic converter?
The mesh is part of the adapter’s exhaust-facing opening. The main catalytic converter treats the exhaust flowing through the pipe and must stay in place.
Does it need wiring changes, welding, or ECU programming?
On a compatible application, the adapter installs into an existing threaded port. The original sensor plugs back into the same connector, with no wiring changes, welding, or ECU programming required to fit the adapter.
1 review for Firaki O2 Sensor Spacer Adapter, 46.6 mm with Mesh Insert
Related products
-

-
Sale!
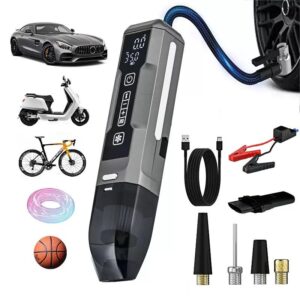
4-Mode Portable Digital Tyre Inflator, Cordless Air Compressor with Power Bank & LED Light
Original price was: ₨ 6,999.₨ 6,899Current price is: ₨ 6,899. -
-
Anonymous –
Great product, Recommended 👍✅